
From Clomosy Docs
No edit summary |
|||
| Line 1: | Line 1: | ||
= Access to the Clomosy Book = | |||
<div class="row"> | |||
<div class="col-lg-6"> | |||
<div class="download-card"> | |||
<div class=""> | |||
[[File:Clomosybook.png|frameless|50px]] | |||
</div> | |||
<div class=""> | |||
Access to the Clomosy Book | |||
</div> | |||
<div class=""> | |||
[[File:RedirectIcon.png|frameless|40px|link=https://clomosy.com/docs/ClomosyKitapV1.pdf]] | |||
</div> | |||
</div> | |||
</div> | |||
</div> | |||
<div class="alert alert-info" role="alert" data-bs-theme="light"> | |||
Follow the steps below to start using the Clomosy application. | |||
</div> | |||
= For use on Windows = | |||
<div class="row"> | |||
<div class="col-lg-6"> | |||
<div class="download-card"> | |||
<div class=""> | |||
[[File:Learnlogo.png|frameless|80px]] | |||
</div> | |||
<div class=""> | |||
Download Clomosy Learn | |||
</div> | |||
<div class=""> | |||
[[File:Download.png|frameless|30px|link=https://clomosy.com/win/ClomosyLearn.rar|]] | |||
</div> | |||
</div> | |||
</div> | |||
</div> | |||
== Mobile Installation and Registration Procedures == | == Mobile Installation and Registration Procedures == | ||
=== Mobile Installation === | === Mobile Installation === | ||
Revision as of 14:11, 20 September 2024
Access to the Clomosy Book

Access to the Clomosy Book

Follow the steps below to start using the Clomosy application.
For use on Windows

Download Clomosy Learn

Mobile Installation and Registration Procedures
Mobile Installation
Clomosy Learn Download
We need to download the application from the application markets.
Google Play Store: Clomosy Learn
File:ClomosyLearnGooglePlay.png
App Store: Clomosy Learn
Clomosy Learn Download
Google Play Store: Clomosy Learn
App Store: Clomosy Learn
Please do not define the same user account when registering on mobile and web. Create different accounts for both registrations.
Mobile Registration Procedures
After downloading the application, the Login screen below appears. Click on the Register button here.
Fill in the relevant fields on the Register screen below and click the register button to create a user account.
As soon as you press the Register button, a code will be sent to your e-mail address and we enter this code on the "Confirmation code" page.
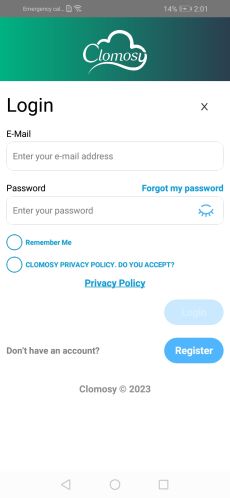
Mobile Login Screen
- MobileRegisterV1.1.jpg
Mobil Register Screen
- MobileConfirmationCodeV1.1.jpg
Mobil Confirmation Code Screen

You are now a Clomosy member. You can log in with your user e-mail address and password by coming to the login page. After the login process is completed, when you click on the profile photo on the top left of the screen, the following page will appear.
You can access the user's GUID by clicking the red squared area on this page. With this code, you will add yourself to your company's project.
! Before giving this code, let's register Clomosy on the web and create a project on the company.
Web Registration Processes
Click to access the Clomosy web page.
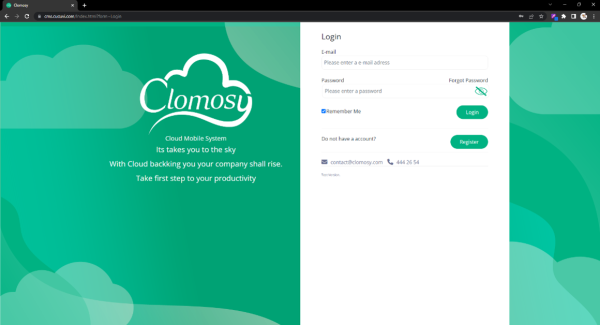
Web Login Screen
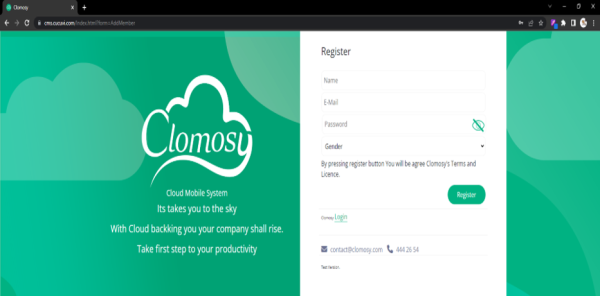
Web Register Screen
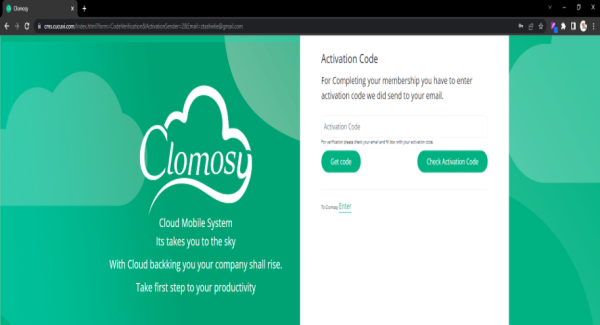
Web Activation Code Screen


You can log in, register on the page above and if you forgot your password, you can get a new password.
For account registration, you need to fill in the fields on the "Register" screen. After you fill in the fields and click the Register button, the "Activation Code" screen will appear.
On this page you will fill in the activation code we sent you.
After completing all the steps, you can successfully log in from the "Login" screen.
We have now completed the registration process on both Mobile and Web.
Now let's create a project and learn how to use the Clomosy application. For this, visit the Project Creation page.